
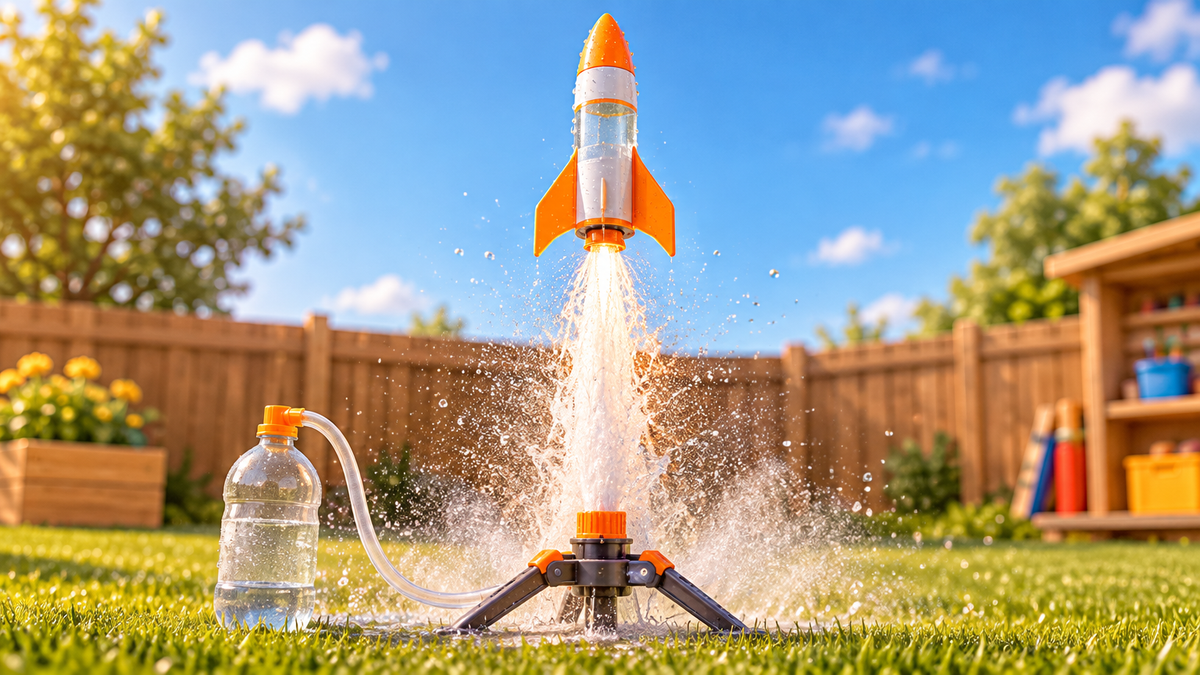
A water rocket launches because of one straightforward principle: you pump air into a sealed chamber that already holds water, pressure builds until it releases, and the water shoots out of the nozzle so fast that the rocket flies the other way. That action and reaction is all the science you need to get started, and you can test every part of it in a backyard with a kit that needs no tools and no batteries.
The two most common types beginners try are a water-pressure rocket, which you pump and launch, and a chemical rocket powered by a baking soda and vinegar reaction. Both teach the same core ideas about pressure and propulsion, but they feel completely different to run. The sections below explain each one, compare them side by side, and show you exactly what to change on launch day to send a rocket higher.
The science behind a water rocket launch

When you pump air into a partly water-filled rocket, you are squeezing more air molecules into a fixed space. That compressed air presses equally on every surface inside the rocket, including the water sitting above the nozzle. The moment you release the launcher, that pressure has only one exit: the nozzle. Water rushes out in one direction, and by Newton's third law the rocket accelerates in the opposite direction.
The water itself is what makes the thrust powerful enough to send a rocket more than 50 feet into the air. Once all the water is expelled, the remaining air escapes and thrust stops, but by then the rocket is already moving fast enough to coast upward on its own. You can see this directly with the My First Water Rocket: pump it, release it, watch the water jet and the climb, then refill and run the experiment again.
- More pumps mean more compressed air, which means more force on the water
- A partly filled rocket outperforms a full one: you need air space to compress
- Once the water is spent, the rocket coasts on momentum alone
- The nozzle size controls how fast the water exits and how long thrust lasts
What changes how high it flies
Launch height is not fixed. It changes every time you adjust the water level, the number of pumps, or the launch angle. A good starting experiment is to keep everything constant except one variable at a time. Try three pumps, note where the rocket lands, then try six pumps with the same water level and compare. Record the results and you have a real hypothesis-and-test loop, which is exactly how scientists work.
Fill level matters more than most beginners expect. A rocket filled to about one third with water and the rest with compressed air tends to outperform one that is nearly full. Too much water and there is not enough air pressure to push it all out quickly; too little water and the thrust is short and weak. Adjusting that ratio is one of the most satisfying experiments to run because the difference is immediately visible.
- One third water to two thirds air is a common starting point for beginners
- More pumps add pressure but have a ceiling: too much can stress the launcher
- A steeper launch angle sends the rocket higher; a shallower angle sends it farther
- Wind direction and launch surface also affect where it lands

Two kits, two ways to launch

The My First Water Rocket from PlaySTEM uses air pressure and water. It has 15 pieces, requires no tools or glue, no batteries, and includes a learning booklet. It can reach more than 50 feet. Michael P., a customer, wrote about his experience: "Grandpa had fun showing them how to refill with water, pump, and launch the rocket." That refill-and-go loop is a big part of why it works so well for families: each launch feeds directly into the next experiment.
The Reaction Rocket from PlaySTEM works differently. Instead of pumping air, kids add baking soda to the rocket body and vinegar to the launcher. The chemical reaction produces carbon dioxide gas, which builds pressure until the rocket lifts off. The same principle applies: gas pressure has one exit, so the rocket goes the other way. Because the amounts of baking soda and vinegar can be varied, kids can run their own experiments to find which combination produces the highest flight. A learning booklet is included.
- My First Water Rocket: fill with water, pump air, launch, repeat
- Reaction Rocket: baking soda plus vinegar produces CO2 gas that lifts the rocket
- Both kits include a learning booklet that explains the science
- My First Water Rocket requires no tools, glue, or batteries
Water rocket vs. chemical rocket: a quick comparison
Both types teach pressure and propulsion, but they suit slightly different learning moments. The table below puts the two kits side by side so you can choose the one that fits your launch day.
| Feature | My First Water Rocket | Reaction Rocket |
|---|---|---|
| Propulsion source | Compressed air pushing water | CO2 gas from baking soda and vinegar |
| Setup | Fill, pump, launch | Add baking soda and vinegar, step back |
| Reusable per session | Yes, refill and relaunch immediately | Yes, with fresh ingredients each time |
| Key variable to experiment with | Water level and pump count | Amounts of baking soda and vinegar |
| No batteries or glue needed | Yes | Yes |
| Learning booklet included | Yes | Yes |
Launch day checklist
A little preparation before you go outside means more launches and fewer restarts. Run through this list once and you are ready to experiment properly.
- Pick a flat outdoor space with clear sky overhead and no overhead wires
- Bring a container of water so you can refill between launches without going back inside
- For the Reaction Rocket, measure out baking soda and vinegar in advance so you can vary amounts deliberately
- Write down each launch setup: water level, pumps, and where the rocket lands
- Change only one variable at a time so you know what made the difference
- Stand well back after setting the launcher

How does a water rocket work?
A water rocket works by storing compressed air in a sealed chamber that contains water. When the rocket is released from the launcher, the pressurized air forces the water out through the nozzle at high speed. Because every action has an equal and opposite reaction, the rocket shoots upward as the water shoots downward. Thrust continues until the water is gone, and the rocket then coasts on the momentum it has built.
How does a water rocket launch?
The launch sequence has three steps. First, you add water to the rocket body, leaving an air space inside. Second, you attach the rocket to the launcher and pump air in until you reach the desired pressure. Third, you trigger the release mechanism, which unseals the nozzle. The pressure difference between the inside of the rocket and the outside air drives the water out instantly, and the rocket leaves the launcher in the opposite direction.
How does a bottle rocket work?
A bottle rocket works on the same principle as a water rocket. The name usually refers to a rocket made from a plastic bottle pressurized with water and air. The bottle body holds the pressurized water, and when it is released the water exits through the bottle's neck, which acts as the nozzle. Kits like the My First Water Rocket are purpose-built versions of this idea, with a proper launcher, a stable body, and a learning booklet, rather than a loose plastic bottle.
The chemical version, like the Reaction Rocket, is also sometimes called a bottle rocket. There, a chemical reaction inside the chamber generates gas pressure that replaces the hand-pumped air. The physics of the launch are the same: pressure builds, it finds the nozzle, and the rocket lifts off.


Share:
Best Build Your Own Robot Kits for Kids: A Beginner's Guide for Ages 6 to 12